
Saas-Fee in 3D: SWISSIMAGE aerial imagery and elevation data
Find SWISSIMAGE orthophotos and swissALTI3D elevation data, add WMTS imagery or offline GeoTIFFs in MapTools, and explore Saas-Fee in 3D.
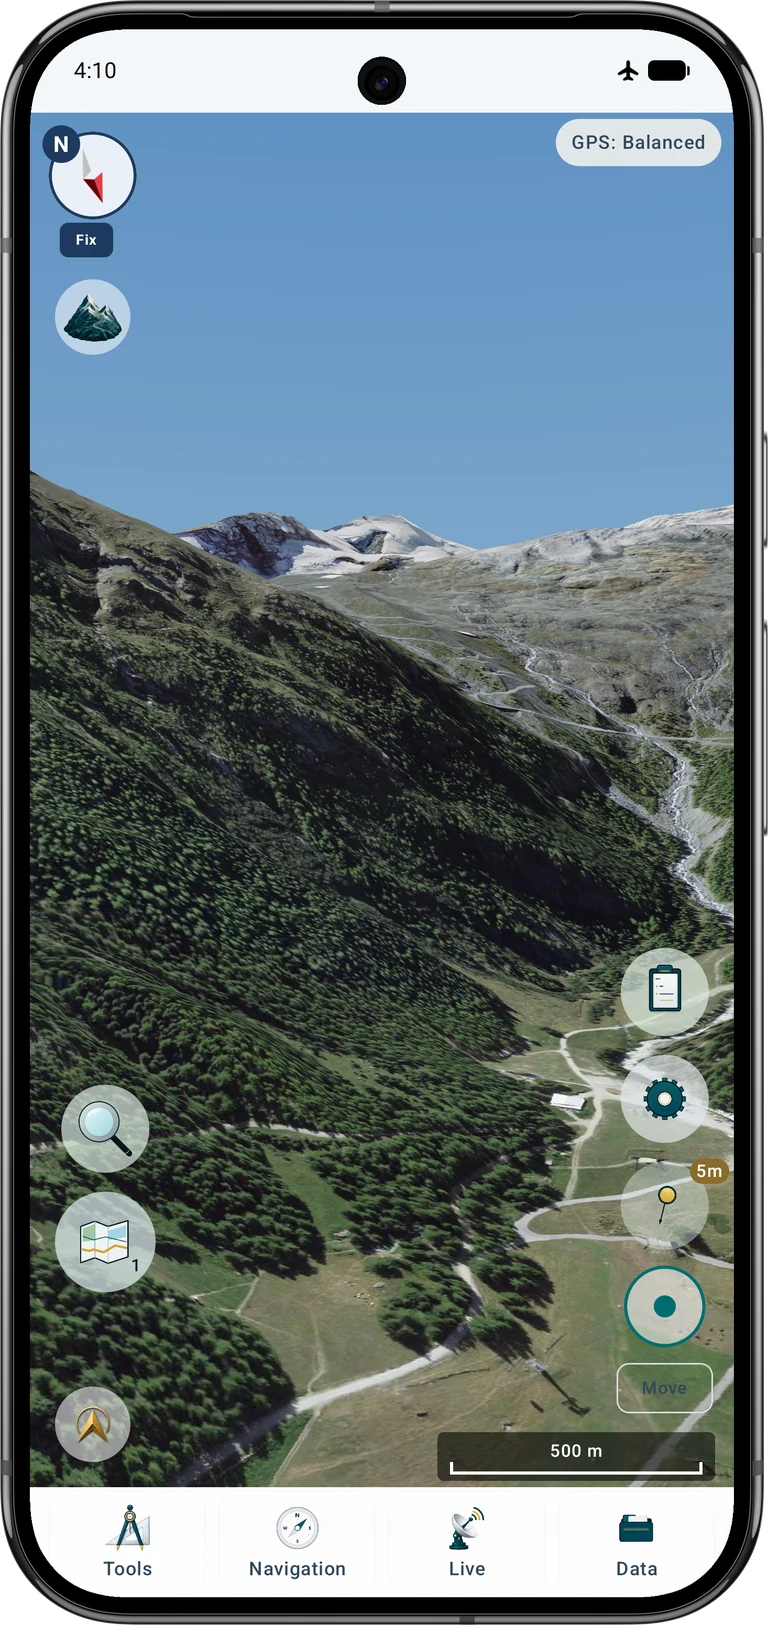
German pages show German app captures; other languages show the English captures. The Pixel 9 Pro XL frame is consistent across the series. Example data: SWISSIMAGE and swissALTI3D, © swisstopo.
What you will create
Start with an empty project and just one aerial-image source. You will prepare the Saas-Fee–Allalin area, check the sources on the ordinary map and then move from a terrain overview to a virtual viewpoint. The same method works elsewhere when suitable local data is available.
Keep your existing projects. Create a separate example project or select an empty one, and disable unrelated layers in the current map slot. Projects organise geographic objects; map and elevation sources are managed separately. An empty project alone does not remove existing service connections or disable their layers.
Two sources: imagery and terrain
An orthophoto supplies the colours and visible details: paths, rock, glacier surfaces and roofs. A digital terrain model supplies numeric ground heights. MapTools combines the image with the terrain surface. An aerial-image WMS or WMTS does not supply these heights; importing a shaded-relief picture as a DEM will not create real terrain.
For Switzerland, use SWISSIMAGE for imagery and swissALTI3D for a ground-only elevation model. Buildings and trees visible in the photograph do not automatically become separate 3D objects. These datasets are not bundled with MapTools.
Cover the viewpoint and the whole visible mountain landscape, not only the village. A practical starting area extends approximately from 7.87° E to 7.97° E and from 46.025° N to 46.140° N. Select every intersecting tile and leave a margin for movement. Mountain horizons can require a wider area.
For the elevation model, 2 m is a useful starting grid; swissALTI3D also offers 0.5 m. For sharp close-up aerial imagery, choose SWISSIMAGE in its finest available original download variant rather than the coarse 2 m image. The example combines original-detail tiles around Saas-Fee with a wider 2 m image mosaic for distant terrain. Original imagery needs substantially more storage. Nominal pixel spacing is not guaranteed survey accuracy or native image detail; acquisition date, source quality and height reference still matter.
Download the right data for Saas-Fee
Open the SWISSIMAGE product page and its free download interface. Navigate to Saas-Fee and select a rectangle or polygon covering the surrounding mountains. Generate the selection and download the GeoTIFF original imagery for the nearby terrain; its file name may contain 0.1. A coarser 2 m variant can supplement the distant surroundings. Check the actual resolution and acquisition years in the product information: these are not live images.
Repeat the area selection for swissALTI3D. Choose the 2 m numeric elevation GeoTIFFs in CH1903+ / LV95 (EPSG:2056), with the provider's LN02 height reference. Do not substitute a hillshade, contour-map image or a text file with a changed extension. Both the embedded georeferencing and the actual elevation values must remain intact.
Copy the downloads onto the Android device and unpack downloaded archives when needed. Keep imagery and heights in separate folders. You can import individual original tiles; repeat for adjacent tiles, or prepare a ZIP containing the relevant supported GeoTIFFs. For a compact example, adjacent tiles may also be merged into one georeferenced mosaic in a GIS. The screenshots use one prepared image mosaic and one elevation mosaic, each covering the same area.
If you prepare a mosaic in QGIS, merge imagery and elevation separately. Preserve the CRS, pixel size and georeferencing; preserve numeric elevation bands and NoData values for the DEM. Do not export the map canvas as a screenshot. A mosaic is optional: the original tiles are also valid inputs. Keep the provider's source and licence information with your files.
Import and enable the elevation data
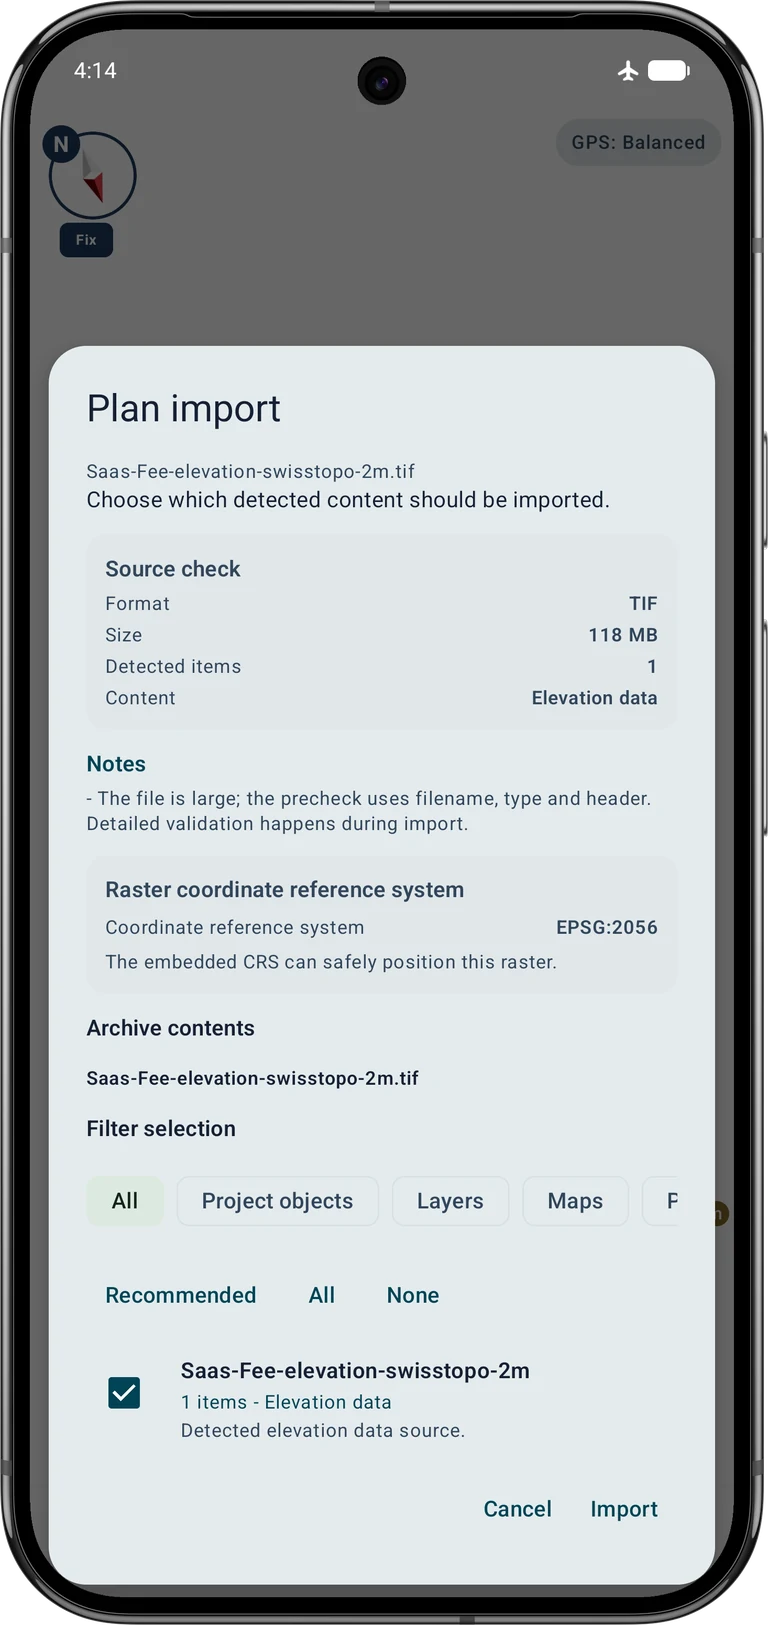
Open Data → Data Center → Import data → Choose file, leave automatic recognition selected and choose the elevation file or supported archive. In the import plan, check that the content is Elevation data, the CRS is EPSG:2056 and the geographic extent is plausible. Confirm Import; wait for completion before closing the result.
Open the map browser from the map-source controls and enable the imported elevation source under Elevation data. Check its bounds and resolution. If several overlapping models are available, disable the unrelated ones for this example. Elevation sources and visible image layers have independent activation states.
Option A: aerial imagery from an online service
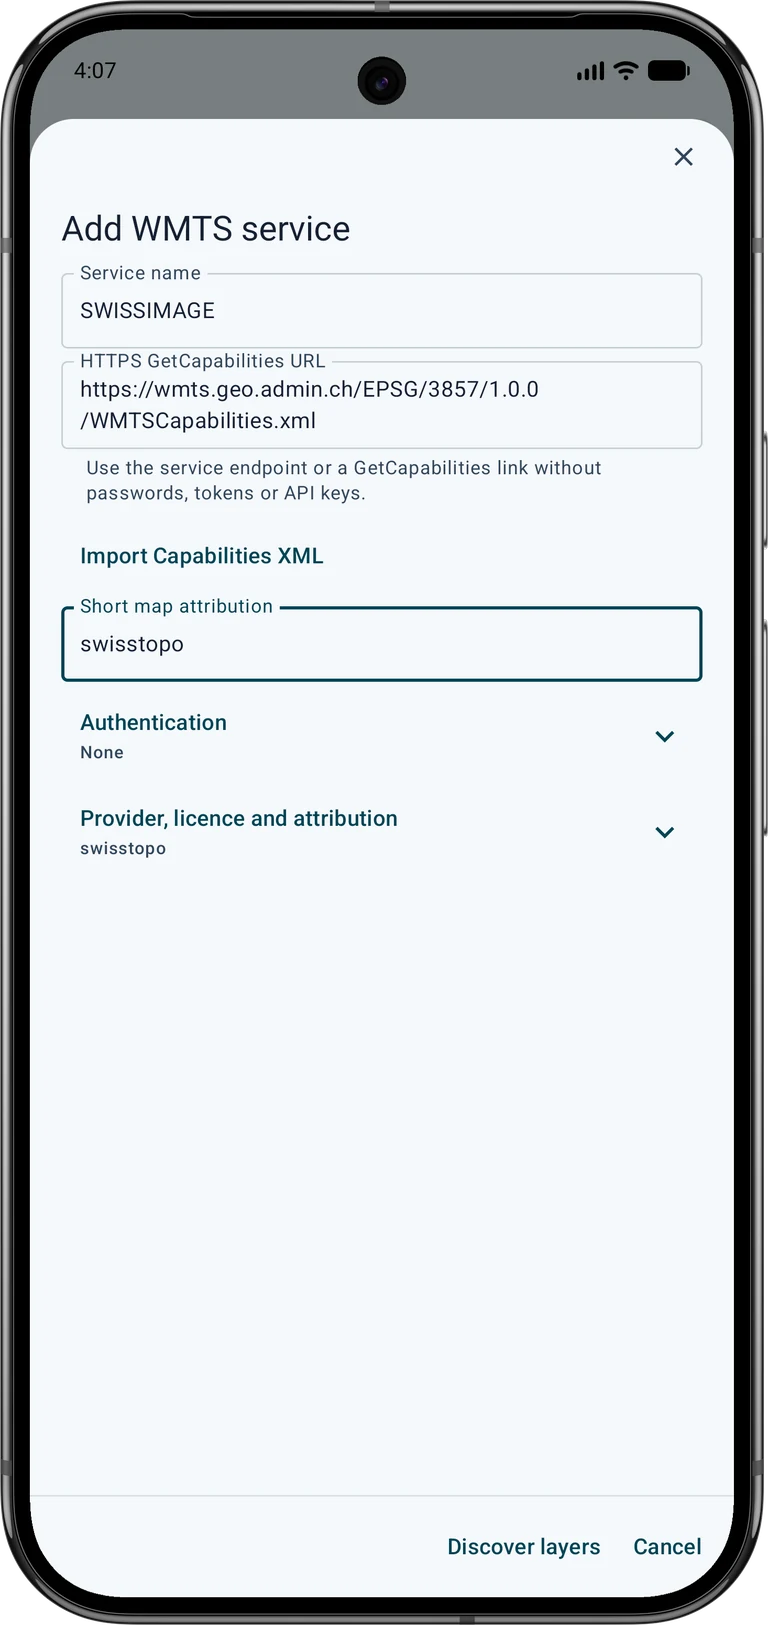
In the map browser, open the online-map section and add a WMTS service. Give it an identifiable name, such as SWISSIMAGE. Enter the capabilities URL below. This endpoint explicitly uses EPSG:3857; do not replace it with a different Swiss tile grid merely because the service has a similar name.
https://wmts.geo.admin.ch/EPSG/3857/1.0.0/WMTSCapabilities.xmlLoad the service information, select the SWISSIMAGE layer identified by ch.swisstopo.swissimage and its compatible matrix set, then save the source. Use the current/default time offered by the capabilities. Enable the source in the current slot as a base map or visible overlay and check that aerial imagery appears at Saas-Fee in 2D.
- Online map services
- Add WMTS service
- Discover layers
- Clear selection
- SWISSIMAGE · ch.swisstopo.swissimage · EPSG:3857
- Test selected
Allow the required map-service network access in MapTools. An online layer needs a working connection unless the required content has been deliberately stored and remains available. A normal display cache does not guarantee complete offline coverage. An alternative is the provider's WMS, but it is still an image service and does not replace the local DEM.
Option B: aerial imagery stored offline
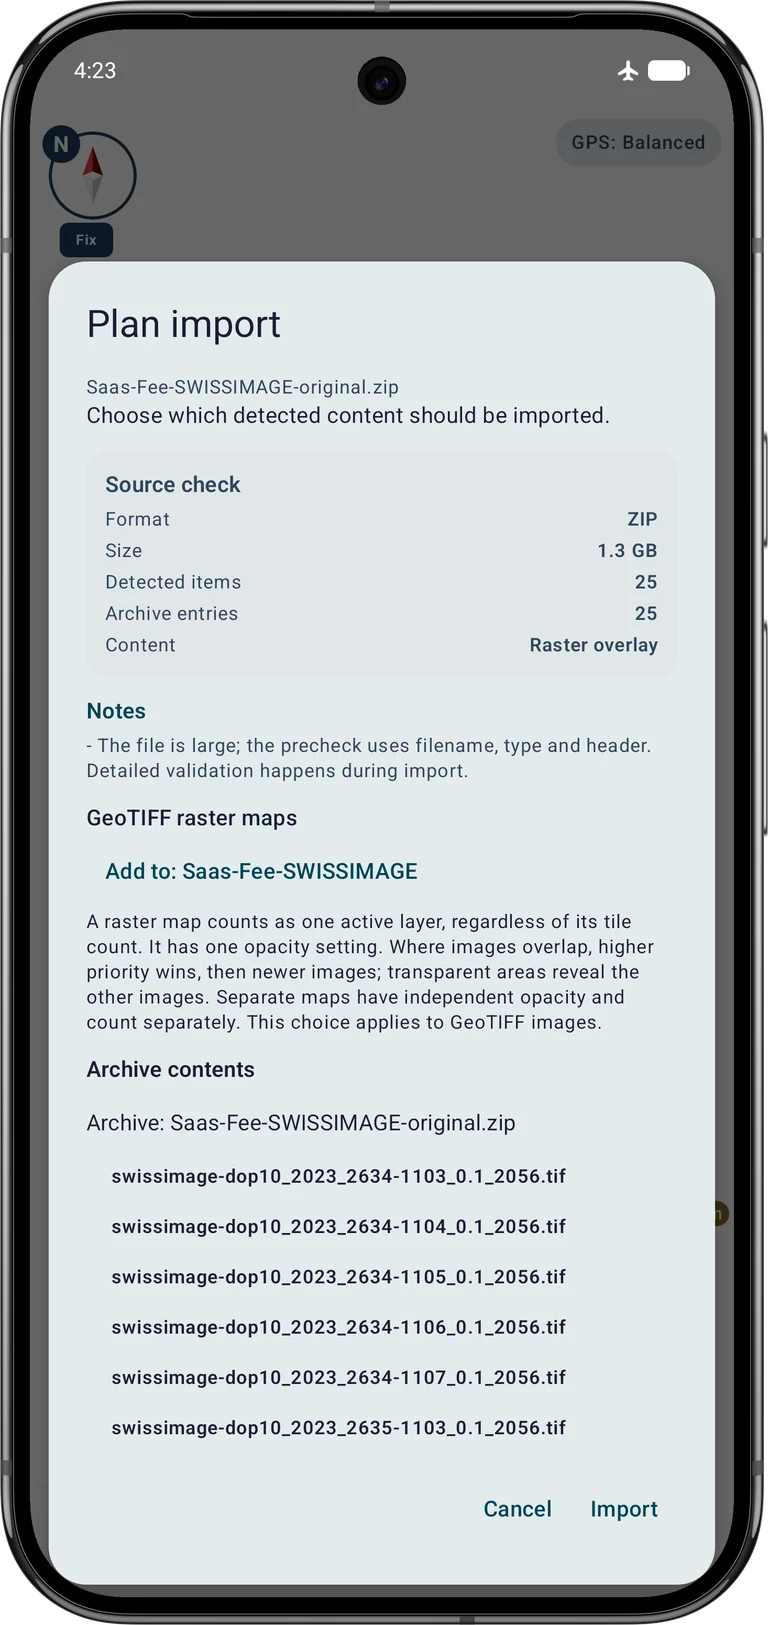
Open Data → Data Center → Import data → Choose file again and choose the SWISSIMAGE image GeoTIFF or an archive containing the selected image tiles. The import plan should identify Raster overlay, not elevation data. For several GeoTIFF images, choose a new raster-map mosaic when you want them to behave as one layer; use separate maps only when you need independent visibility or opacity. For this example, import the wider overview as a new mosaic first. When importing the original-detail ZIP afterwards, select Add to: Saas-Fee-SWISSIMAGE to add its tiles to the same collection.
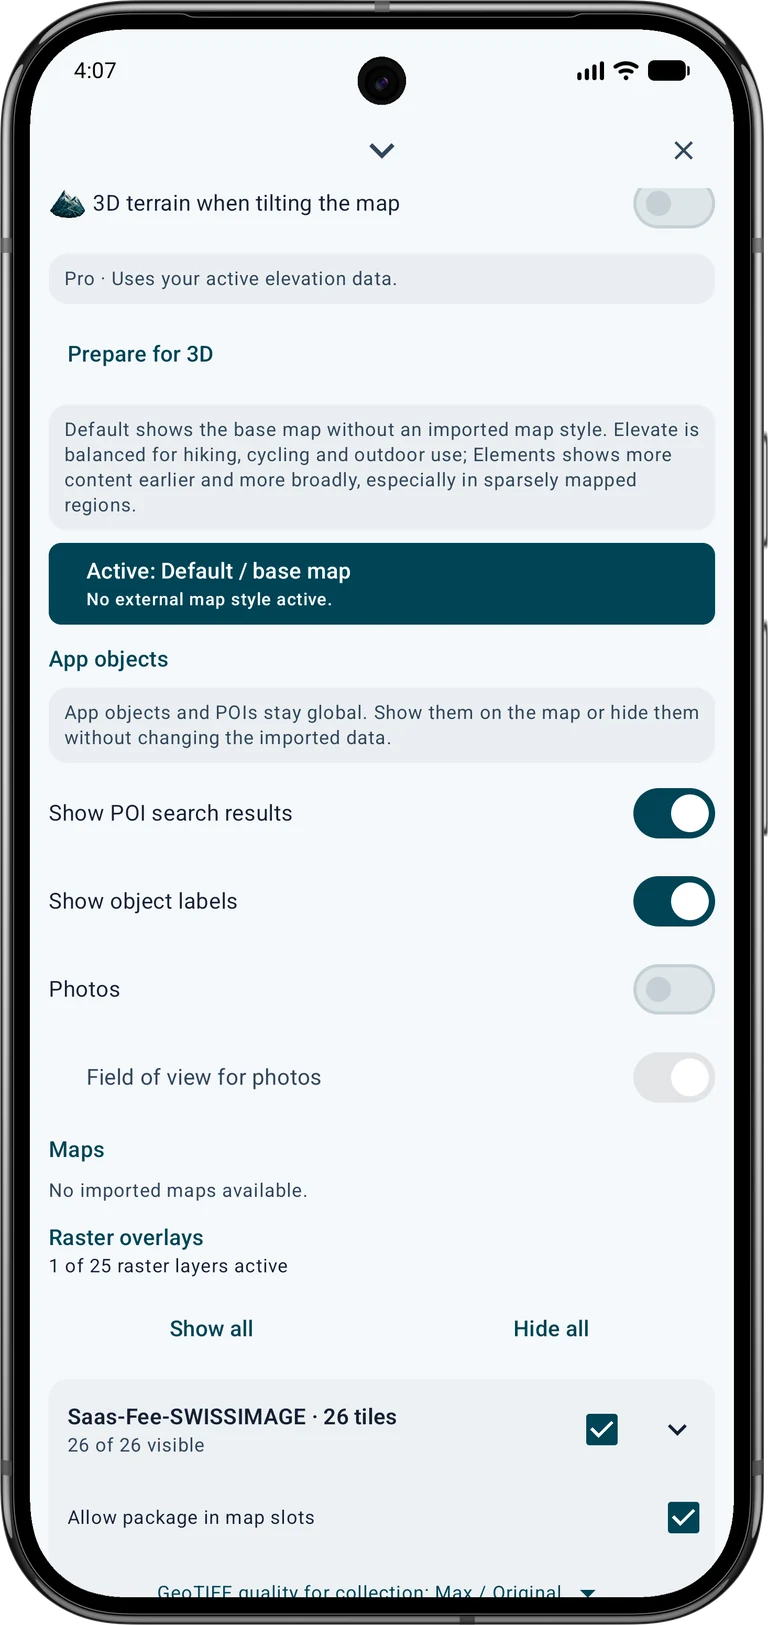
After import, enable the raster map in the current slot, set a useful opacity and check its footprint in 2D. In the map browser, open the raster collection quality setting and select Max / Original for these detailed captures. A higher setting cannot restore details absent from a coarse source. Disable online imagery for the offline example, so a network request cannot conceal a missing local tile. The separately enabled elevation data is still required.
Open the 3D view
Pro · Uses your active elevation data.
Use the map browser's zoom-to-source action, or move the map to the example coordinate below. Start with a compatible OpenStreetMap, local raster/vector or supported online source. Google Maps imagery is not transferred into this 3D view. A downloaded image and a height file must both overlap the displayed area.
In the map slot's layer controls, enable 3D terrain when tilting the map. Tilt the map with a two-finger gesture to enter the terrain view. Alternatively, open the point information at a covered location and choose View in 3D. Finish any active object editing first. The device needs Vulkan 1.1 and a suitable graphics driver.
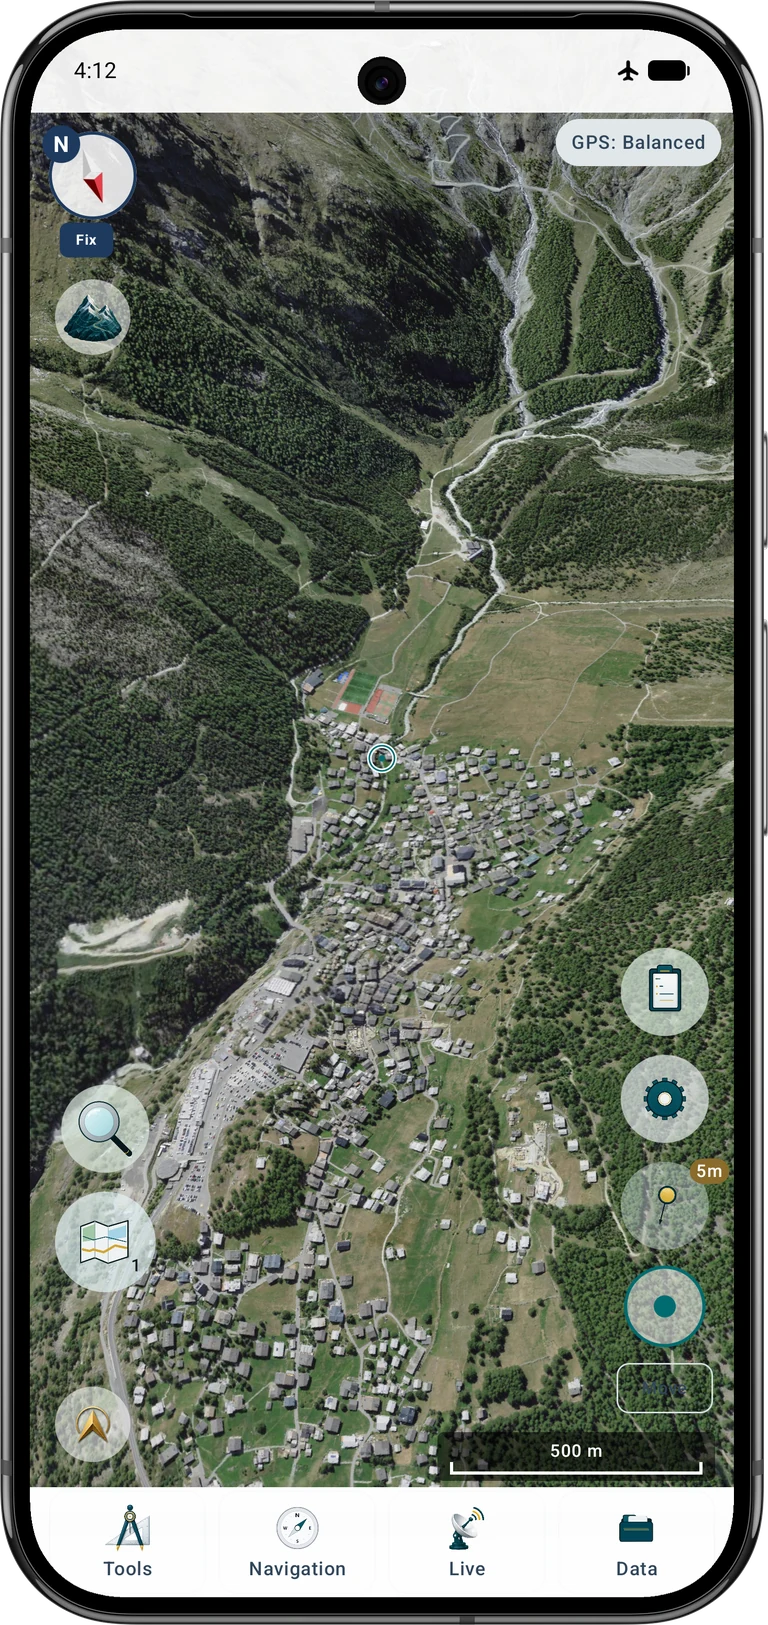
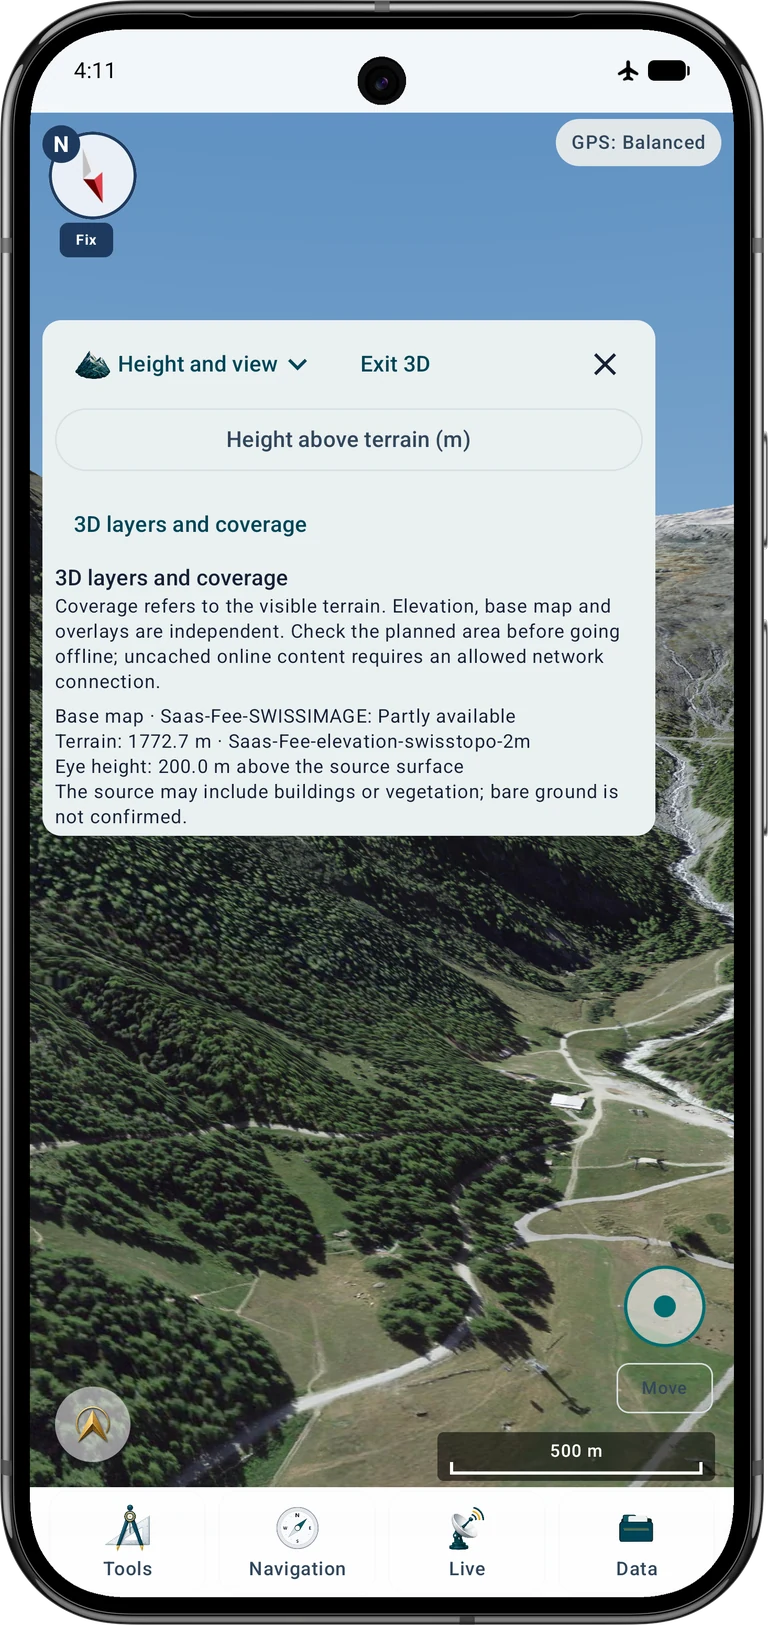
Begin in Overview. Zoom, rotate and tilt with two fingers. Wait for the visible data to load, then inspect 3D layers and coverage. Heights, the base map and overlays are reported independently. A partially available image layer and missing elevation data are different problems and need different corrections.
Reproduce the Saas-Fee viewpoint
Choose Look from here or Explore freely. Under Height and view, set the height above the local terrain. This is the virtual camera's clearance above the source surface, not a GNSS altitude or a new measured point. A higher viewpoint is useful for checking whether a mountain ridge or glacier is represented as expected.
For a comparable view, use latitude 46.104511° N and longitude 7.925276° E, look roughly south-southwest at 200°, and start 200 m above the terrain. Use a 60° field of view and no visual height exaggeration where these controls are available. Adjust the tilt slightly to frame the mountains. These values describe a virtual preview, not a physical observation made at that height.
46.104511, 7.925276 · 200° · +200 m · FOV 60°In free exploration, View changes the viewing direction; Move moves the virtual position with the joystick. Start slowly and remain within the prepared elevation area. Under Height and view, the step buttons provide an alternative to the joystick. Stop and wait if data is still loading. Exit 3D to return to the ordinary map; exploring does not move your real GPS position.
Check the setup without internet
Disable connectivity temporarily and reopen the same area. Pan and rotate across the intended terrain, inspect the nearby mountain slopes and check the source-status panel. Test the local image and height coverage separately. A successful view at one zoom level or one location does not prove that every surrounding tile is stored.
Keep the original downloads until the imported data and its coverage have been checked. Plan enough free storage for sources and converted app data. For a larger tour, extend both datasets before travelling and repeat the offline test. Re-enable your usual network setting afterwards.
Troubleshooting
The terrain is flat or 3D will not open
Check the enabled numeric elevation source, its coverage at the chosen point, the 3D switch and device graphics support. A photo, hillshade or WMS image cannot replace the DEM.
Mountains appear but the surface is grey
Inspect the imagery status, slot selection, opacity and image bounds. For WMTS, check the network permission, service access and supported EPSG:3857 matrix. For offline imagery, check that the required local tiles were imported and enabled.
There are edges or gaps in the landscape
Add the missing neighbouring height and image tiles. Check NoData areas and whether the viewpoint looks beyond the prepared footprint. A wider view needs more coverage than a close-up of the village.
The image is displaced or the heights look implausible
Check the embedded CRS and height units/reference. Do not assign a different CRS just to make a warning disappear. A correct visual overlay is not proof of survey accuracy.
Movement stops or the view becomes slow
Remain inside usable elevation coverage, wait for loading and reduce active layers or the visible area. Very fine, extensive source data can exceed the device's practical resources. Let a hot device cool down.
Can I obtain both the photo and terrain from this WMTS?
No. This SWISSIMAGE WMTS supplies map images. Import and enable a numeric elevation model separately. For dependable offline use, prepare and check local imagery as well as local heights.
Sources and further instructions
swisstopo makes its standard OGD downloads and public geoservices available free of charge, subject to its terms and fair-use limits. Special preparation or additional services may cost money. Credit © swisstopo when sharing imagery or derived views. These terms are distinct from a blanket CC BY licence.
Sonny's elevation models are an alternative for supported regions. Choose the actual offered format and resolution: HGT and GeoTIFF are different downloads, and not every resolution is provided as HGT. Check the dataset README, credit Sonny under CC BY 4.0 and retain any additional required source credits.
Outside Switzerland, look for an official orthophoto service and a numeric DEM covering the same area. Check format, CRS, height units, extent, registration, fees and reuse/offline conditions before importing. The Swiss service addresses below are examples for Switzerland and do not provide worldwide coverage.
The terrain preview helps compare viewpoints, recognise terrain shapes and prepare an outing. It does not show current snow or glacier safety, weather, route accessibility, or obstacles absent from the model. Judge conditions on site and use suitable navigation and safety information.
- SWISSIMAGE · swisstopo
- swissALTI3D · swisstopo
- WMTS · geo.admin.ch
- WMS · geo.admin.ch
- OGD · © swisstopo
- geo.admin.ch · FSDI
- Sonny · CC BY 4.0
Continue with the related MapTools instructions